Thursday, April 17, 2014

Phases of the Moon Chalkboard Lesson

Just the other day I bought my daughter a chalkboard (pictured below). It was a great price, $14.99 at Hobby Lobby and I had a coupon. I was shocked that a chalkboard this size was priced so low. I highly recommend going there for your chalkboard needs. Chalk itself is priced good as well.

Now, I'm no artist and I can see that my handwriting didn't look too phenomenal here. But whatever, my daughter still learned something. She's 2 years old and she now knows all about waning crescent and waxing gibbous moon phases (plus all the other ones).
So, you'll need a chalkboard and some white chalk. You could also use a black piece of paper and a white colored pencil if you don't have a chalkboard. There's just something about chalkboards that really says "school" to me. 

First I wrote "Phases of the Moon" across the top of the board. Then I drew a circle that I wanted to draw my moons around for positioning. I drew the outlines of each first, starting with waning crescent. In case my handwriting is so bad that you totally can't see, there's: waning crescent, last quarter, waning gibbous, full moon, waxing gibbous, first quarter, waxing crescent and new moon. Capital letters are also probably better since they're names. 

Here's the picture I modeled ours after right here

Then after I had all their outlines drawn I colored them in appropriately with the white chalk, using the eraser as needed to help with shaping and outside the lines mistakes.

Then for the information for the lesson that I was telling my daughter while we looked at this chalk board lesson I used these tidbits 

This was a very productive lesson that I'm sure most preschool age children would enjoy. A new way to use something (in this case, the chalkboard) is always kind of interesting to kids.


Wednesday, April 16, 2014

Easter Sensory Bin

We're definitely gearing up for the Easter holiday here! Here's our Easter Sensory Bin for this year.
The base material was some blue Easter grass and some green Easter grass. I really like the new Easter grasses they have out this year, they're like a cross between paper shred and foil shred. Really great, new sensory experience for kiddos.

Then I added some really simple things. Though it was simple my daughter (at 2 years old) still really enjoyed it. I added a stuffed animal bunny, some plastic eggs in different designs, and a windup chick.

"Jesus Loves Me" Easter Squish Bag

First in this post I just want to say that we are not a family that is religious connecting with Catholic or Christian religions. However, I'm going to educate my daughter on all religions and let her choose the one she connects closest with. So, as a part of educating her on all holidays, I do tell her what Easter and certain other holidays are "really" all about. She thinks all the crosses and Jesus stuff is adorable and it's very innocent letting her play with this squish bag and talking about the "real" meaning of Easter originally. Whether your family is religious or not, if you're homeschooling, it's still important to discuss all of this at some point, especially since it is what a lot of people believe in. We'll discuss in way more depth once she's middle school to high school aged. Anyway! Here's the "Jesus Loves Me" Easter Squish Bag that I made for her!
It is super cute!

To make a squish bag like this for your little one you'll need:
- A Ziploc bag (I used sandwich sized)
- Craft foam "Jesus Loves Me" hearts and crosses. You may be able to find the sticker kind, or the kind that's just foam at your craft store. Either one works fine, we used some of both in ours.
- Clear hair gel (can be purchased at Dollar Tree)
- Yellow food coloring
- Masking tape

Step 1:
Squirt enough clear hair gel into the Ziploc bag. It's really your call, you'll have to feel around with it. There's no exact measurement. Once you've got enough add in some drops of the yellow food coloring and mix that around with your fingers. Be careful, too much yellow food coloring turns to orange very, very quickly!

Note: during this step don't get the part where it zips shut wet with hair gel or you'll have a harder time sealing it up when finished. You can zip it shut when mixing and be careful to not squish the gel up to the very top during.

Step 2:
Open the bag and add in the "Jesus Loves Me" hearts and the crosses. You can stick them in to the hair gel a bit, or just lay them in there. Then zip the bag shut and move them around a bit.

Step 3:
Put some masking tape around the top and bottom of the bag so it can't be opened or get a hole on one of the bottom corners.

Step 4:
Give it to your little one! Show them how to squish it and move the objects around with their fingers. This will hone their fine motor skills.

How To Make Pet Rocks

Aren't these adorable little friends to make as a fun Spring or Summer outdoor craft? Not only are they cute, they can also help kids become ready to have a real live pet. Pretending to take care of these can teach some responsibility and make kids feel like they're doing something important.
To make these all you'll need is:
- As many rocks as you want
- Glue
- Googly eyes

We picked a few rocks we thought would make cute pets from our backyard, and then we glued some googly eyes to them. It couldn't be more simple to put them together. My daughter loves to see them on display in our classroom/play room and check on them often!

Monday, April 14, 2014

Zoo Bath

This bath is a great addition to a zoo animals themed week or lesson plans. It doesn't take too much time to put together either!
You will need:
- Neon green food coloring
- Black crepe paper
- Black construction paper
- Tape
- Scissors
- Shaving cream
- Plastic containers
- Makeup brush or paintbrush
- Neon blue food coloring
- Green food coloring
- Animal paper cut outs from Dollar Tree

Fill up the tub with water and color it with neon green food coloring.

Cut strips of black crepe paper down to size for the outside of the tub area and tape them to it to look like cage bars at the zoo.

Cut out the word zoo out of black construction paper and tape it up in between the bars like I did in the picture.

Tape up the animal paper cut outs on the shower wall. Then make bath paint in green and neon blue, and paint little areas of grass or water underneath the animals for their habitats. 


Wooden Bead Sensory Bin

Wooden beads are a really great loose material that provoke imaginative play. I chose to put them in a sensory bin for this activity and gave my daughter a spoon and a bowl beside it. She got right to transferring the wooden beads! You can purchase wooden beads at Michael's. 

Sunday, April 13, 2014

Reindeer Pancake

Now, I've seen a lot of reindeer pancakes floating around on Pinterest, but I must say I think mine is the best! The antlers I've seen are always made of bacon, and not everyone eats bacon (especially young kids). So here's my rendition that I made for my daughter for breakfast on Christmas last year.
Ingredients:
-Pancake mix of your choice
- 2 blackberries
- 1 strawberry
- Amber agave nectar (or maple syrup, whatever you prefer your kids have)

So, you make a pretty decent sized pancake first for the reindeer's head, then you make a smaller one for his little nose area. Then you make another big one and overcook it a little so it's more brown than the other pancakes. Cut that pancake into the shapes of two antlers. You can just do four strips, two big ones and two little ones and then lay them on the pancake/plate how they go. 

For the rest of the face, add two blackberries for the eyes, and cut off the leafy top of a strawberry and use that bottom up for the nose. Then you can add some agave or syrup onto it or give it to your kids in a little bowl for dipping if they'd like.

Homemade Pastel Paints for Easter

My daughter and I decided to great creative and make some Homemade Pastel Paints the other day to do some Easter crafts with! Making homemade paint is a great activity for kids to have fun in the kitchen. They can help with the measuring, pouring, and stirring! There may be a little mess involved if you let them just go at it, but at least it's not a recipe you'll be eating in case things go awry!

First, you'll need to get out all your ingredients. My daughter loves helping get everything we'll need and set it all out on the counter.
You'll need:
- All-purpose flour (I buy a huge bag from Target that I use only for sensory play/paints
- Neon purple food coloring
- Green food coloring
- Yellow food coloring
- Neon pink food coloring
- Water (you'll end up needing quite a bit more than a cup if you're making big batches like we did)
- Something to put the paint in (pictured is our paint palette, but we actually used 4 regular bowls to make the paint in, you'll see them further down)
- Spoons
- A fork

Note: If your bottles of food coloring don't have the squeeze one drop out at a time function like ours did, you might want to use a pipette or eye dropper to add the food coloring in to the paints so you don't add too much. You probably won't though cause quite a bit is still needed to get any color at all, but I know I'm guilty of pouring out way more than needed with the open/pouring style food coloring bottles.

So, depending on how thick you want your paint to be how much flour and how much water you use will vary. I didn't measure out what I was using, it's not an exact science. You can add some flour to each bowl first if you want, or just go one at a time. Use a fork to get the clumps out of the flour before you add the water, I forgot to do this the majority of the time and our paints ended up having some clumps in them. Then add water and mix the two together, adding more water or more flour to get the finger paint consistency that you're after. My daughter enjoyed the mixing!
Once you have that mixed pretty much all the way you can start to add the coloring. Obviously you only use one color per bowl. Start with a drop or two and add more as needed to get the right color. I seemed to need to add some more flour after this step to thicken it up more and help the colors look more pastel, but things might go differently for you depending on how much of what you already used.

When you've got all 4 paints made they should look something like this
You can see how some of ours were a bit clumpy, and how we had more of some colors than the others. I spooned some into my daughter's paint palette so she could get creating without having all 4 big bowls in front of her.
She got right to painting!

 Adorable!

Note: This paint either needs to all be used the day it is made, or stored in the refrigerator. It will get funky not since there is food ingredients used to make it.

Momma's Perfume Playdough

This playdough recipe is sure to delight any little girl (or guy) and it's perfect for Valentine's day play, pretend play, or just regular playdough play!


To make Momma's Perfume Playdough for your child all you'll need to do is add a few tablespoons of one of your perfumes or body sprays into your favorite playdough recipe as you make it. I'll share ours with you

Ingredients:
- 1 cup of flour
- 1 cup of water
- 1 tbsp lemon juice
- 1/4 cup salt
- 1 tbsp vegetable oil
- Neon pink food coloring, enough to get the desired color
- 3-4 tbsp of perfume or body spray

Step 1:
Mix all ingredients in a pot with a wooden spoon.

Step 2:
Put on the stove over medium heat and stir with the wooden spoon constantly until it forms a ball.

Step 3:
Transfer the dough to a bowl and let it cool while you wash the pot.

Step 4:
Knead the dough into the perfect consistency of playdough. Doesn't take much kneading at all!


My daughter thought it was so neat that she had perfume that smelled like mommy! The perfume I chose to use had a flowery scent to it, and if yours does too they can use the playdough to have a pretend play flower shop. We used this playdough in February for Valentine's Day to make Love Slugs.

Friday, April 11, 2014

Homemade Scented Shape Flashcards (DIY)

Do you love doing flashcards with your tot? I know I do! It always makes me feel good to make/do a homemade version of any of our favorite things. I loved presenting flashcards I made all on my own to my daughter! I made Scented Shape Flashcards.
To make these and have them be scented like ours you'll need:
- Index cards or card stock paper cut down to size
- Sponge painting shapes
- Paint (I used acrylic paint)
- A Koolaid packet in the scent of your choice
- A paper plate or something similar
- A sharpie marker (preferably fine tipped)

Step 1:
Mix the paint and the Koolaid packet together on your paper plate or whatever you're using. Dip each sponge shape, one by one, into the scented paint and make it's print on the index card. Once they're dry use the sharpie marker to label them with the names of the shapes. I also added how many sides each had. 

Your child will love having these scented flashcards as a part of their math learning tools.

Painting With Nature

Spring is an excellent time of the year to discuss things in nature, and to go on walks. If you ever go on a walk with your child you can collect a few things along the way that you think they'd like to paint with. Painting with things other than their fingers or a brush is really fun and engaging for them. We gathered some different things and I'm not sure what to call them! Interesting parts of the grass, things from trees, things found on the ground that are part of nature..anything works!

My daughter wanted to use orange and yellow paint. I had it on a paper plate, and gave her a sheet of finger paint paper and all our nature objects with it and allowed her to get creative! It turned out beautifully. 

Birdseed Sensory Bin

Sometimes a one base material sensory bin with no additives in it can be the funnest! My daughter loves her birdseed sensory bin. I gave her some of her Baby Bullet jars to use for scooping and pouring and she went to town.
Set up couldn't be easier, just pour some birdseed into sensory bin. A big bag of birdseed can sometimes be a little costly. Just remember that using it in this way is very frugal as it can be used over and over again. When we're not using ours that we use for our bins I keep it in a big Ziploc bag. Birdseed also has many other uses, like feeding birds!

Bug Themed Birthday Party

For my little girl's second birthday party we had a bug themed party! I'm going to share with you now some of the things that we had/did. I don't have pictures of every single thing though! Now, we had two parties, we had one at home and one at a painting pottery place.

For the one at home we made some finger foods to snack on and cupcakes and dessert.
We had Ants on a Log and pinwheels to look like Snail Tails.
To make Ants on a Log just prepare some celery how you normally would and then spread some organic peanut butter on and top with some organic raisins to look like the ants.

To make Snails Tails you need tortillas (sun dried tomato, or spinach flavor make for funner colors), cream cheese (vegan, goat's, or regular), lunch meat like ham, and pickles. You just make the tortillas into the strips of sizes they need to be in, spread a thick layer of cream cheese, add the ham and the pickle and roll up into a snail tail shape.

Next up is our Wormy Apples
This was really simple to set up and made for really cute decoration. All you need is apples, and gummy worms. I set out a bowl of gummy worms and then put three apples with the gummy worms sticking out of them in front of it. To get the gummy worms into the apples I just used a knife to make a small hole in the apple and stuck them in.

For the dessert for the at home party I just made these cupcakes.
I made lady bug cupcakes, butterfly cupcakes, and simple bumble bee cupcakes.
 For the lady bug cupcakes I used a mini muffin tin. Just strawberry cake mix, vanilla icing dyed pink, and then gel black icing to add the dots.

For the butterfly cupcakes I used pastel cupcake liners in a regular sized cup muffin tin. I used golden cake mix for these and some strawberry too. Then I dyed the vanilla icing light green with food coloring, then broke a pretzel in half an stuck those in for the wings. After the wings were placed I dyed some of the vanilla icing a pretty blue color and put it in a ziploc bag with a hole cut in it to squeeze it out to look like the body of the butterfly. Finally I added a green or blue M&M on for the heads, and then used the black gel icing again to add antennae.

For the bumble bee cupcakes I used yellow cupcake liners in a regular sized muffin tin. I used golden cake mix for all of these. I dyed the vanilla icing a beautiful light yellow color with yellow food coloring and spread it onto the cupcakes as elegantly as I could. I did make one bright yellow with a tube of bright yellow icing too.

Note: I am normally very against kids and eating food coloring, but this was a birthday party for my daughter so I just went for it!

Next up is the game that I made to play. It's a bug dig!
To make a Bug Dig Game you fill up a kiddie pool with paper shred (Easter grass). I had brown, red, pink, and yellow because that's what we had already and couldn't find any more packages of brown in the stores. I would've rather had it all be brown so it looked like dirt, but whatever, the kids didn't care! Then I hid a bunch of bugs in the paper shred. I used packs of small bugs and centipede things that are sold at Dollar Tree around Halloween time, and a package of big bugs that I purchased at Joann Fabric's. The kids LOVED the big bugs, my daughter's holding one in the photo above.

For our party at the painting place this is how I set up the table. I wish I had a picture of everything in the goodie bags, but I can just explain what's in them I suppose!

I covered the table with a purple plastic table cloth. I laid out flashcards from an insect flashcards pack all around on the table. I also put some in 3 little bug paper holders that I found at the grocery store. There was butterfly paper plates, napkins, and cups from Dollar Tree. The plastic utensils were kept in a Zipoc bag. There was a lady bug timer out as decoration, the cake, and that little smiley face thing is a balloon holder for the butterfly balloons we had.
Now, for the goodie bags! I couldn't find any good bug bags, so we used these clear ones from Dollar Tree with different colored flowers on them. In the goodie bags was: bug houses, stretchy spiders, magnifying glasses, and bug books.

Now for a better picture of the cake


We had this cake made by a bakery at a local grocery store. They had the flowers on there made of icing. They stuck in some insect food picks and plastic rings. You can buy food picks and food rings of all sorts on bento accessory websites or Amazon.

Not the greatest picture, and I only have a picture of one of the chairs..but as a simple decor idea I attached a pair of butterfly wings to every child's seat at the painting place. You can purchase these butterfly wings at Dollar Tree in varying colors. They make a lovely addition to dress up/pretend play at home as well.

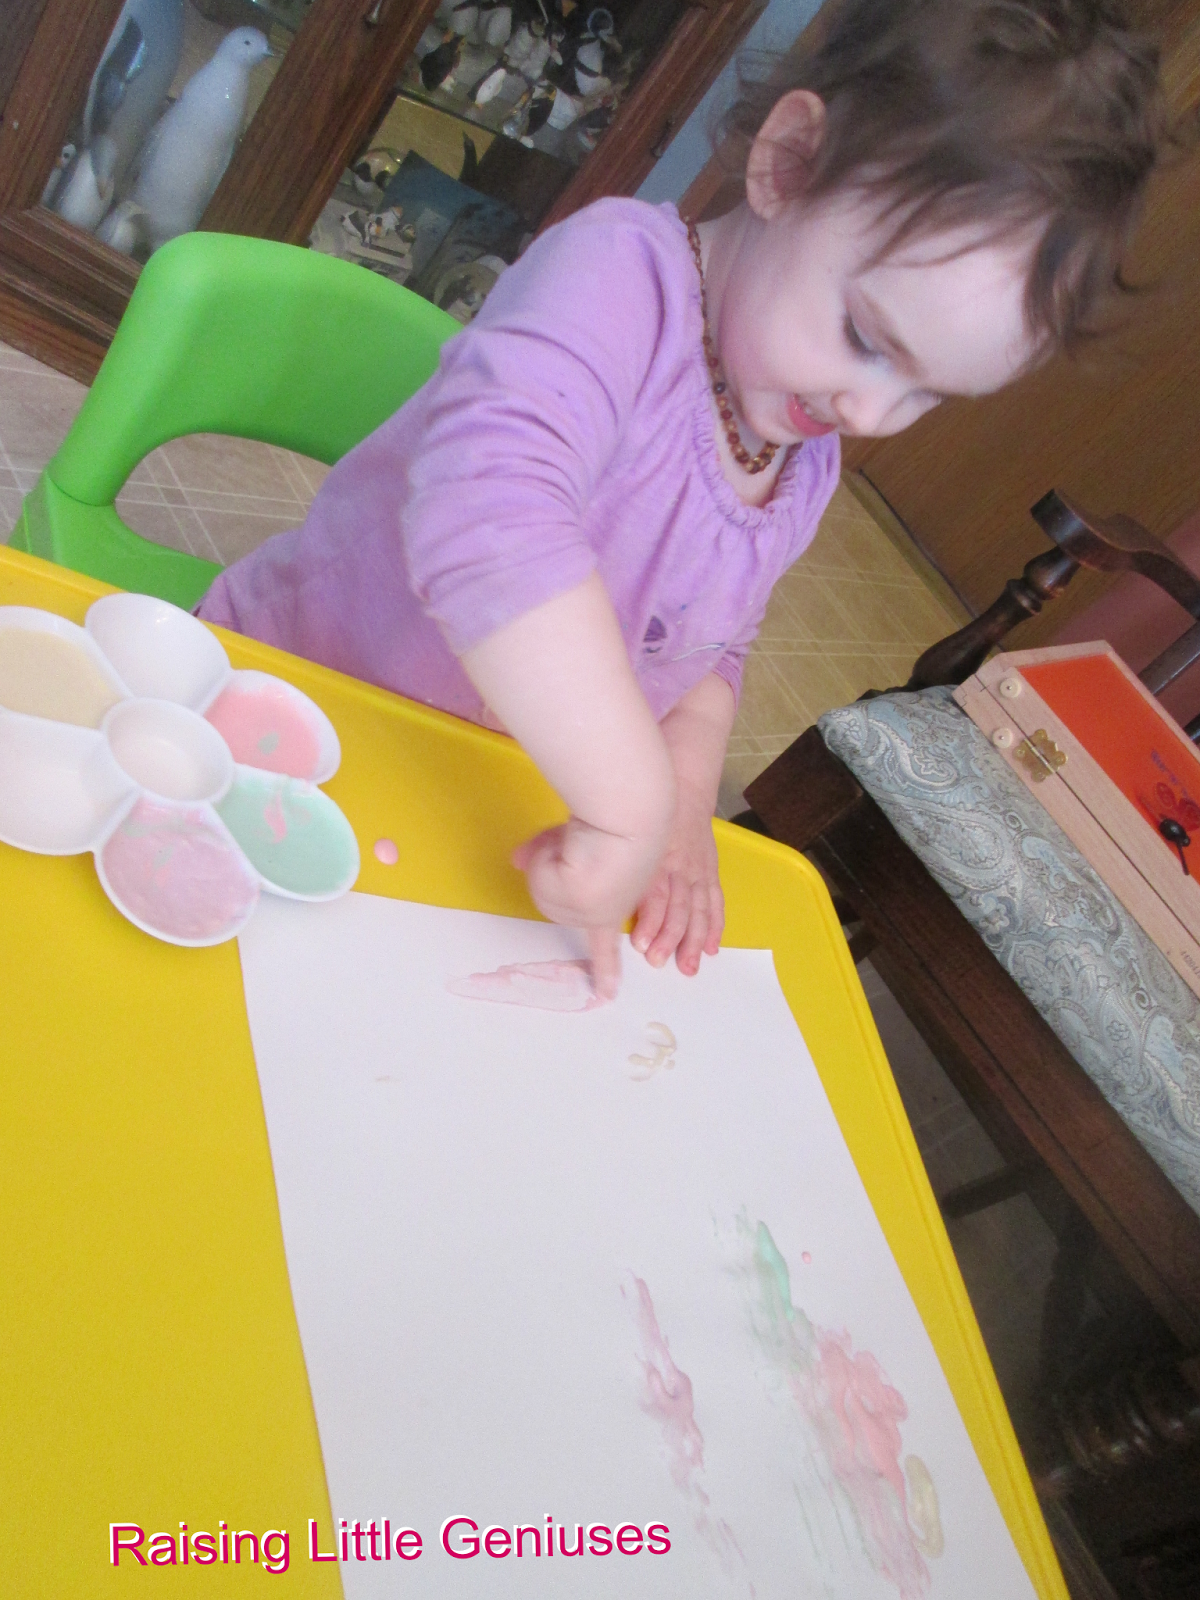
They got to paint some adorable little insect pottery. Since my daughter was the birthday girl she got an adorable big butterfly. The other children got to pick from dragonflies or snails/slugs.

Wednesday, April 9, 2014

Ocean Water Play

My daughter, like most children, LOVES doing water play. If you haven't tried it with your little one yet you definitely should. It's always a hit here! Water play indoors is always okay if you have towels and such nearby, water play is the summer months is a good idea too as a way to beat the heat outdoors. For this water play session I went with an Ocean theme.
To start I got out one of our sensory bins and filled it up with water, then mixed in some neon blue food coloring until I got the color I wanted. Then I added in some seashells and the contents of our Animal Planet Animal Head Tube - Sea Life tube

My daughter played and played for a while. At first she delighted in looking at all of the sea animals. The great thing about the ones from the Animal Planet tube is that they all have the names written on their bottoms so you can work some knowledge in during play.

After a while I gave my daughter a plastic cup so she could pour the water, or collect sea animals in it.


Tuesday, April 8, 2014

Baking Apple Pies Sensory Small World

This is the sensory small world pretend play bin that we made with our Cinnamon Scented Rice. I just put the cinnamon scented rice in the bin, then added some Little People princesses, pretend apples, and a whisk. I sat out a small toy oven  next to it, and a measuring spoon and cup. 

I set this up as an invitation to play and told my daughter she was making apple pies with the princesses! She got to work right away!


Cinnamon Scented Rice

Here's our Cinnamon Scented Rice that we like to use for sensory play. It adds color and scent to a sensory bin perfect for the Fall apple pie making season. See our favorite bin we've made with this rice here.

Ingredients:
- White rice (enough to fill a bin the way you like)
- Red food coloring
- Cinnamon
-Alcohol or vinegar

Put the rice in a Ziploc bag and add in some alcohol or vinegar then shut the bag and mix it around with your fingers until it's coated. Then add in the red food coloring and cinnamon and do the same. I used lots and lots of cinnamon!

You can either let it dry in the bag or lay it out on a piece of foil.

Monday, April 7, 2014

Breast Milk Popsicle

Breast milk popsicles are a great thing to give to babies and toddlers to help cool them off in the summer heat, or soothe teething pain. They're very simple to make and can be made in perfectly proportioned sizes with these Tovolo Jewel Pop Molds
This is one that I made with the above mentioned popsicle mold set! All you have to do is pump or hand express some breast milk and then pour it into the molds and freeze. For a young baby you could pour the breast milk into ice cube trays and make breast milk ice cubes that you could put in a mesh feeder such as this one from Munchkin.

Saturday, April 5, 2014

"Are You My Mother?" Tabletop Activity

I love to bring books to life for my daughter. It's easy to bring the "Are You My Mother?" book from Dr. Seuss to life with a few toys and animal figures! Having an activity on a tabletop puts more focus on it rather than just having it sprawled out across the floor, but gives you more room than a tot tray.
I set out the book, and then I set up everything in the order that it went in the book. In case you're not familiar with the book, there's a baby bird who can't find his mother and he asks several things along the way if they are his mother. He asks a cat, a hen, a dog, a cow, a car, a boat, a plane, and a construction vehicle. He eventually ends up back in the nest in the tree with his mother. 

Our baby and mother birds came in a pack from Dollar Tree
The big cat is a ball baby toy that was donated to us
The chick that we used for the hen is from Dollar Tree
The dog, cow, and airplane are all Little People toys
The car is a police car stress reliever from Walgreens
The boat is a sandbox toy
The construction vehicle was donated to us, but it is Fisher Price
The tree/nest for the birds is just a recycled paper towel tube.

So the point is for the child to take the baby bird and move it all around the table, trying to find it's mother. It may help if you read the story during play, but reading it once before may be sufficient enough.

Turtle Labeling Activity

This activity that I made with paper, colored pencils, index cards, scissors and a pen is inspired by this Montessori puzzle. My idea with it was to get my pre-reader used to looking at words and to start learning them, as well as teach her about the parts of a turtle. This activity is very easy to put together and can be used with a Pond Animals Theme.
Now, I know I am no Picasso, but I've got to draw these things to the best of my abilities sometimes for DIY home school resources. All I did was draw a turtle on a piece of paper and write "Reptile Turtle" on the paper as the label for the paper. Then I wrote all the parts on index cards and cut them down to size. The parts are carapace, neck, head, claws, plastron, and legs. I have all the labels sitting on and around the turtle in this picture where they're supposed to be.

Friday, April 4, 2014

Patriotic Process Art

Looking to get your kiddo covered in paint like this? You've came to the right place! We love process art here, and we created a great one for the 4th of July last year.

The way it looks above is not the finished product, it got so much more added to it the colors started mixing and almost looked a little purple in some spots, but we made sure they didn't mix too much. After all, it was supposed to be Patriotic, and there's no purple on the flag!

All you need is a white poster board, and red and blue washable tempera paints.

The idea is to let your little one squirt the paint on the poster board, and walk/hop/skip/run/crawl all through it. They can get a new sensory experience by squishing the paint around with their toes. You can talk about why red, white and blue are patriotic colors. Most importantly, it gets kids up and moving and creates a wonderful work of art when it's all said and done.

Note: Doing this outside like we did will help minimize the mess. It's also handy to have wet wipes nearby and possibly towels ready in the bathroom for a quick rinse off.

Gross Motor Baseball Painting

I only took a picture when we first started to demonstrate, since I got in on the action with my little one. This is a great painting activity for when baseball season starts, it's something you could do with your tot before home opener is on to get them excited. It's also just something fun to do outside to get up and moving and strengthening those ever so important gross motor skills.

We brought a piece of finger paint pad paper outside and set it on our little table. You could also use poster board if you think your tot will want to do this for a while, and if you want to make an artwork on a bigger scale. We also brought out our baseball, and red washable tempera paint. We used red paint because we root for the Cardinals, you can use whatever color team you root for if you want. However, I think we would've chosen red anyway because baseball's are red and white no matter what team you're rooting for. I think that's actually why we chose the red!

Now, to start you can just squirt some of the paint on the side of the paper, or put some on a paper plate and coat the ball on that first. But then you and your little one will want to roll the ball all over the paper to create gorgeous artwork with the seams of the ball, and again strengthening gross motor skills.

Colors of the Wind Bath Paint

I made this bath paint for my daughter after we watched her Disney Princess Sing-a-long DVD. One of the songs is the one from Pocahontas where she sings about the colors of the wind. The song is so magical and my daughter just loves it, so I knew she'd love this bath paint..and she did!

To make this bath paint you'll need:
- A muffin tin with 6 spaces
- Shaving cream
- Washable tempera paint, or food coloring in the following colors: red, orange, yellow, green, blue, and purple. We used washable tempera paint for this batch of bath paint, so that's what you see in the picture above. 

I just squirted some shaving cream into each muffin tin section, and then one by one added some washable tempera paint and mixed it in with a makeup brush, rinsing between colors of course.

Zoo Animals Word Wall

This is the first word wall I'm sharing! We usually do a word wall for each of our themes. Even before children can read they really benefit from being in a print rich environment. I like to use a pointer and read all the words each time we enter the classroom. So here's our Zoo Animals Word Wall
The animal cutouts were purchased from Dollar Tree. There were some other animals included in the pack and duplicates of each. Very worth the $1 they cost!

For the words I used index cards, a Sharpie, and funky scissors. I just write each word on a separate card and then cut them out. I had a title "Zoo Animals" and then the words were zebra, hippo, elephant, monkey, kangaroo, horse, giraffe, zebra, bear, penguin, sting ray, lion, and tiger. Your words might be a bit different depending on what's at your zoo.

Rainbow Qtip Art

This is a fantastic craft. It serves as an opportunity for kids to paint in a way they never have before, while honing their fine motor skills when they don't even know it! It also helps to teach the rainbow, and colors. This craft can be used as a card (like ours obviously says "Welcome Back!").

All you need for this is a piece of paper, paints (preferably washable tempera) in all the colors of the rainbow, and Qtips.

Explain to your child what you'll be doing. If your child will it exactly how it's supposed to be, great! If not, here's a helpful trick. Cover the sections of paper underneath the part that's being worked on with another sheet of paper, moving it down as needed. This won't stop them from adding colors where they don't belong, but it will help. The point is to use the Qtips to make dots of each color on the page in sections that are about the same size, in the right order of course. Ours turned out beautifully! 


Orange Creme Sensory Dough

This sensory dough is so great because it is scented like a flavor of sherbert. That makes it perfect to use for pretend play. When playing pretend with this wonderful dough kids will get to act out scenarios, learn a bit about money concepts, scoop and pour (transfer), all while their senses are being stimulated.

Ingredients for the dough:
- Baking soda
- 1 Duncan Hines Frosting Creations Packet in Orange Creme
- Water

Other things you'll need:
- Large bowl
- Measuring spoon
- Gallon size Ziploc bag
- Small bowls (I use a set of plastic dip bowls from Target)
- Pretend money
- A sign saying what the child is selling and how much it costs (optional, helps with having child be in a print rich environment so they get used to labels and signs even before they can read)

Just fill your bowl with the desired amount of baking soda, then add very little water a time, slowly, until you have a consistency that you can mold a bit and crumble easily. Too much water and it will become all liquid very quickly. Once you've got that mix in the Duncan Hines Frosting Creations packet.

Set this all up for your little salesperson. Put out the bowl of dough (sherbert), serving bowls, sign, etc. Have your money ready! You can take turns playing who is the buyer and who is the server. You can talk about the service industry and how much things cost. You can give specific orders and amounts, ask for change back, etc. Let your imaginations flow and the pretend play go on.

My daughter loved this activity!
 

Edible Apple Pie Paint

In the fall season there's lots of talk of apples and apple pie, but these things go on in other seasons too so I'm sharing it now in spring anyways!

Lots of people are always searching for "edible" paint recipes that they can use to allow their babies or young toddlers to get creative without fear they'll ingest something toxic. This paint recipe is totally edible, but still the ingredients aren't things I'd want my daughter eating really. She doesn't eat the paint though so it's not a cause of concern for us. Many parents would not mind there kids ingesting this paint either.

To make this wonderfully scented sensory paint just put some whipped cream in a bowl (we used the kind that comes out of a spray can). Then add a drop of green food coloring and mix it in with a spoon or a straw. Then shake in some spices that you like for apple pie. We used cinnamon and a little bit of nutmeg.

I gave my daughter a small paint brush to use with her paint. She made some beautifully smelling art work!

Red & Green Complimentary Colors Sensory Bin

Once children know their basic colors I think it's important to start introducing concepts such as complimentary colors. Red and green of course are familiar complimentary colors. I didn't do this bin around Christmas time, but it easily could be a fun addition for babies and younger toddlers to explore some of the holiday colors around that time as well. I think it's so cute of a bin that really promotes abstract thinking.
For the base material I used a bag of split peas. They can be found at the grocery store by the beans. Then for the red I added four red blocks. I really like the way there's not only the red and the green, but there's also the squares and the circles in this bin.

Thursday, April 3, 2014

Pirates Treasure Oobleck

Today I'm going to share with you a VERY FUN and VERY MESSY sensory play experience your kids will absolutely love. First things first, the main material is oobleck (aka goop on some occasions). If you've never made Oobleck before then read on to find out how.

To make this black oobleck for your Pirates Treasure Oobleck bin you'll need:
- Cornstarch
- Water
- Black food coloring (this will leave yours and your little ones hands stained until you get a good soak in the tub, so if you're opposed to that you can buy black washable liquid water colors and use that instead)

First, put the desired amount of cornstarch into your bin. Then slowly add some water and mix with your hands until you get the right consistency. It will probably end up being about 70% cornstarch at least in your mixture. If you add too much water it'll be all watery and won't work at all. You should be able to grab some of it up with your hand and then it should instantly start turning back into a liquid and running off your fingertips. The sensation is amazing and I think I might love it more than my daughter! Guaranteed neither of you will be able to keep your hands out of it. Okay, okay, back to the how-to. After you've got that mixed how it needs to be, add just a couple drops of your black coloring and mix it in with your hand or a spoon.

Then to turn it into Pirates Treasure Oobleck add in a whole package of fake jewels from the aquarium section of your local pet store.

Tell your little one the main idea of this bin and let their imaginations take control of the rest. For added fun you could also give them an eye patch.

This activity is best done outside since it is pretty messy. The mess can be contained though if you'd rather do it inside. Just stay on surfaces that you're able to wipe down afterwards, and keep plenty of paper towels (wet and dry) nearby. I've also found that when doing such messy play it's handy to have the bathroom prepped for a quick rinse off or bath. Having the towels and such already there will assure you don't get them messy when you're grabbing them too.

Firefighter Sensory Bin

This bin, just like our Policeman Sensory Bin is a great addition to a Community Helpers Theme for home school tot school or preschool. I have a little girl who really enjoyed this bin, and I'm sure many boys and other girls would love it to.


The base material for this bin is pinkish/red epsom salt. The only thing that mattered about it for the bin was the color. I got ours from the Dollar Tree and it was peony scented, no big deal to us, but if you want all aspects to stick with the theme you can dye your own plain epsom salt the color you desire, or even dye white rice red.

I added our uppercase and lowercase homemade Montessori style letter cards to the bin. I also added a magnetic letter F, a big flame I made from craft foam, scissors and tape, and some little firemen figures. You can get the figures at the Dollar Tree, as well as the craft foam that I used. I just cut flame shapes out in red, orange and yellow, making each layer smaller and then taped them to each other. I think it turned out really cute and my daughter loved it.

Simple Oats Sensory Bin

My tot, like most others in the world, delights in activities where she can transfer a material from one container to the next and back again. This sensory bin allows her to do exactly that, and it's frugal considering that the material can be reused again and again and again.
I filled up a bin with some oats and then provided my daughter with a small plastic measuring cup and a mixing bowl. She used both her hands and the measuring cup to transfer. Using the hands is great sensory play and exploring new textures.

Bottle Cap Color Sorting

Kids love to sort, plain and simple! Dollar Tree sells some wonderful 3 section trays that my daughter loves to use to sort. One of her favorite things to sort is bottle caps. I recycle lots of our bottle caps for this and other craft/learning purposes. 
As you can see we had green bottle caps and white bottle caps for this sorting activity. I made 3 labels for the 3 section tray. I just used a green post-it note for the "Green" label, and a white index card cut down to size for the "bottle cap sorting" and "white" labels. My daughter was to young to actually read the labels at this point, but it really benefits kids to get used to being in a print rich environment from a very young age. As adults we're always dealing with labels and signs so it doesn't hurt to get them in the habit.

My daughter grasped the concept very quickly and had lots of fun sorting all the bottle caps.